Gadgets are easy-to-use mini programs that give you information at a glance and provide easy access to frequently used tools. Though in Windows 7 you won't see the sidebar like in Windows Vista. You can just drag the widget in your desktop where ever you want.
Let's see how to play with Desktop Gadgets in Windows 7:
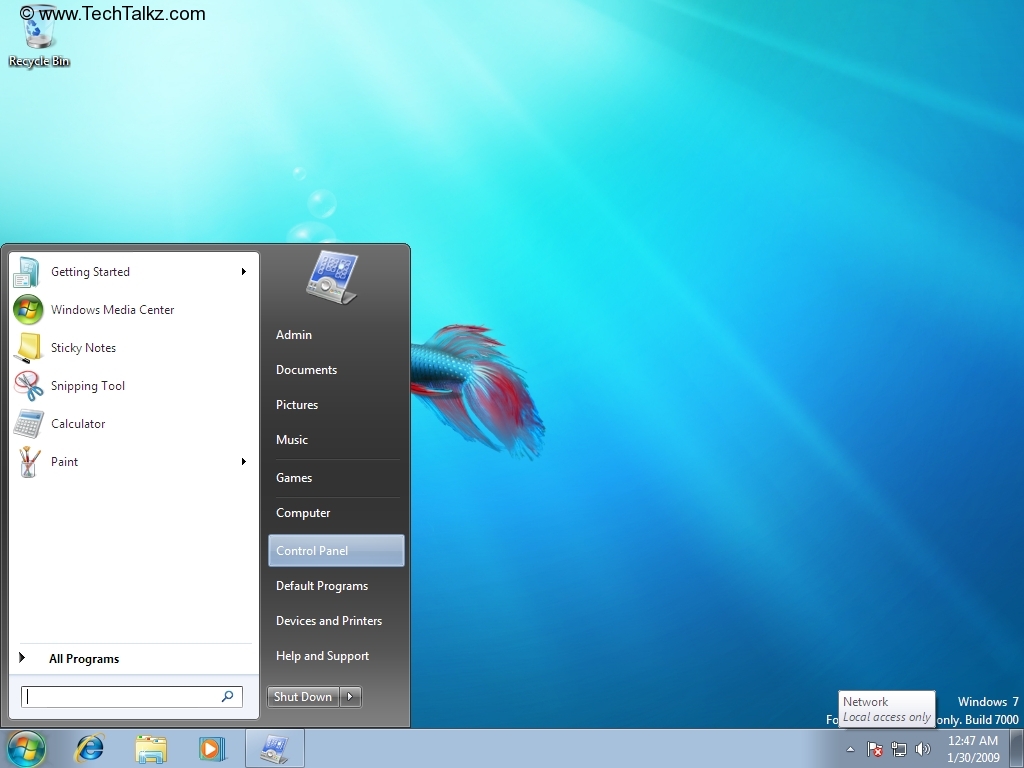
1. Click the Start and then choose the Control Panel option
2. The Control Panel window opens up. Click Desktop Gadget.
3. All Gadgets list will be shown as below.
4. Double-Click the Clock. It will be displayed on the desktop.
6. Now Double-Click the Calender.
You can show the Gadgets in larger and smaller size. By default they are shown in smaller size.
To show calender in larger size click on Larger size below the Close button.
7. Click Down Arrow ahead Show Details to view the Gadgets Detail. You click on Hide Details to hide the details.
8. Click Get more gadgets online to download gadgets from the Internet.
Thứ Ba, 10 tháng 1, 2012
Devices and Printers in Win 7
The Devices and Printers folder displays devices connected externally to your computer, including devices connected wirelessly or over the network.
The Devices and Printers folder allows you to perform many tasks, which vary depending on the device. Here are the main tasks you can do:
1. Click the Start and then choose the Control Panel option.
2. The Control Panel window opens up. Click Device and Printer.
3. The Device and Printer window opens up with the list of all external devices and printer.
4. Click on Virtual USB Mouse to view it's Properties.
5. Right-click on the Mouse icon and click Mouse Settings.
Click Pointers tab to change the Pointer settings.
Click Apply and Ok.
6. To Add a Wireless or netowrk device click Add a device.
It may take some time to search for the devices. Select the device and follow the instructions.
7. Click Add a printer to add new printer.
Click Add a local printer.
Click Next.
Click Have Disk to install Printer Driver. Browse driver location and click Ok.
Choose Manufacturer and Printer. Click Next.
Type Printer Name and Click Next.
Click Finish.
The Devices and Printers folder allows you to perform many tasks, which vary depending on the device. Here are the main tasks you can do:
- View all the external devices and printers connected to your computer.
- Add a new device or printer to your computer.
- Check to see if a specific device is connected and working properly
- Display detailed information about your devices, such as make, model, and manufacturer
- See what tasks you can do with a particular device.
1. Click the Start and then choose the Control Panel option.
2. The Control Panel window opens up. Click Device and Printer.
3. The Device and Printer window opens up with the list of all external devices and printer.
4. Click on Virtual USB Mouse to view it's Properties.
5. Right-click on the Mouse icon and click Mouse Settings.
Click Pointers tab to change the Pointer settings.
Click Apply and Ok.
6. To Add a Wireless or netowrk device click Add a device.
It may take some time to search for the devices. Select the device and follow the instructions.
7. Click Add a printer to add new printer.
Click Add a local printer.
Click Next.
Click Have Disk to install Printer Driver. Browse driver location and click Ok.
Choose Manufacturer and Printer. Click Next.
Type Printer Name and Click Next.
Click Finish.
How to Change Font Size & Icon Size in Win 7
Display in Windows 7 allows you to make the text and other items, such as icons, on your screen easier to see by making them larger. You can do this without changing the screen resolution of your display. This allows you to increase or decrease the size of text and other items on your screen while keeping your display set to its optimal resolution.
Let's see how to change Display in Windows 7:
1. Click the Start and then choose the Control Panel option.


3. Choose one of the following:
Smaller - 100%. This keeps text and other items at normal size.
Medium - 125%. This sets text and other items to 125% of normal size.
Larger - 150%. This sets text and other items to 150% of normal size. This option appears only if your monitor supports a resolution of at least 1200 x 900 pixels.
Choose Larger - 150% and Click Apply.
To see the change, Click Log off now and then Login again.
As you can see in the above Screen shot all the icons, other items and text is displayed in larger size.
4. Click Adjust Resolution in the left pane, window opens up as below.
Choose resolution, click Apply. Display settings popup opens up to ask you to Keep changes or Revert the changes.
Click Advanced settings.
Choose Monitor tab, Select True Color (32-bits) and click Apply and Ok.
5. Click Set custom size text (DPI) in the left pane to customize the text size.
Drag the ruler with your mouse to increase or decrease the percentage.
Click Ok.
Click Apply in the main Display Window. click Log off now to save changes.
Let's see how to change Display in Windows 7:
1. Click the Start and then choose the Control Panel option.
2. Control Panel window opens up. Click Display.
3. Choose one of the following:
Smaller - 100%. This keeps text and other items at normal size.
Medium - 125%. This sets text and other items to 125% of normal size.
Larger - 150%. This sets text and other items to 150% of normal size. This option appears only if your monitor supports a resolution of at least 1200 x 900 pixels.
Choose Larger - 150% and Click Apply.
To see the change, Click Log off now and then Login again.
As you can see in the above Screen shot all the icons, other items and text is displayed in larger size.
4. Click Adjust Resolution in the left pane, window opens up as below.
Choose resolution, click Apply. Display settings popup opens up to ask you to Keep changes or Revert the changes.
Click Advanced settings.
Choose Monitor tab, Select True Color (32-bits) and click Apply and Ok.
5. Click Set custom size text (DPI) in the left pane to customize the text size.
Drag the ruler with your mouse to increase or decrease the percentage.
Click Ok.
Click Apply in the main Display Window. click Log off now to save changes.
Thứ Hai, 9 tháng 1, 2012
How to set Default Location in Win 7
Default Location is a new feature in Windows 7 which is used to enter a default location that programs can use to customize information and services for you based on your location. For example, a program can use your default location to find movie theaters and restaurants that are close to you.
The default location is only used when a program requests your current location and it cannot find a location sensor. The location sensor may be unavailable or not installed on your computer.
Note: Some programs may use the default location in a way that affects your privacy. For example, some programs send location information across wired or wireless networks.
Let's see how to Set and Delete Default Location in Windows 7:
1. Click the Start and then choose the Control Panel option.
2. The Control Panel window opens up. Click Default Location.

2. To provide a general location: Enter a postal code and choose Country/Region.

Click Apply and then Yes.

3. To provide a precise location. Click the Down Arrow ahead More options.

Under More information, enter an address. Click Apply and then Yes.

4. To delete all location information: At the bottom of the page, click Delete information button.

Click Yes and all the location information will be deleted and the window looks like below shown screen shot.

The default location is only used when a program requests your current location and it cannot find a location sensor. The location sensor may be unavailable or not installed on your computer.
Note: Some programs may use the default location in a way that affects your privacy. For example, some programs send location information across wired or wireless networks.
Let's see how to Set and Delete Default Location in Windows 7:
1. Click the Start and then choose the Control Panel option.
2. The Control Panel window opens up. Click Default Location.
2. To provide a general location: Enter a postal code and choose Country/Region.
Click Apply and then Yes.
3. To provide a precise location. Click the Down Arrow ahead More options.
Under More information, enter an address. Click Apply and then Yes.
4. To delete all location information: At the bottom of the page, click Delete information button.
Click Yes and all the location information will be deleted and the window looks like below shown screen shot.
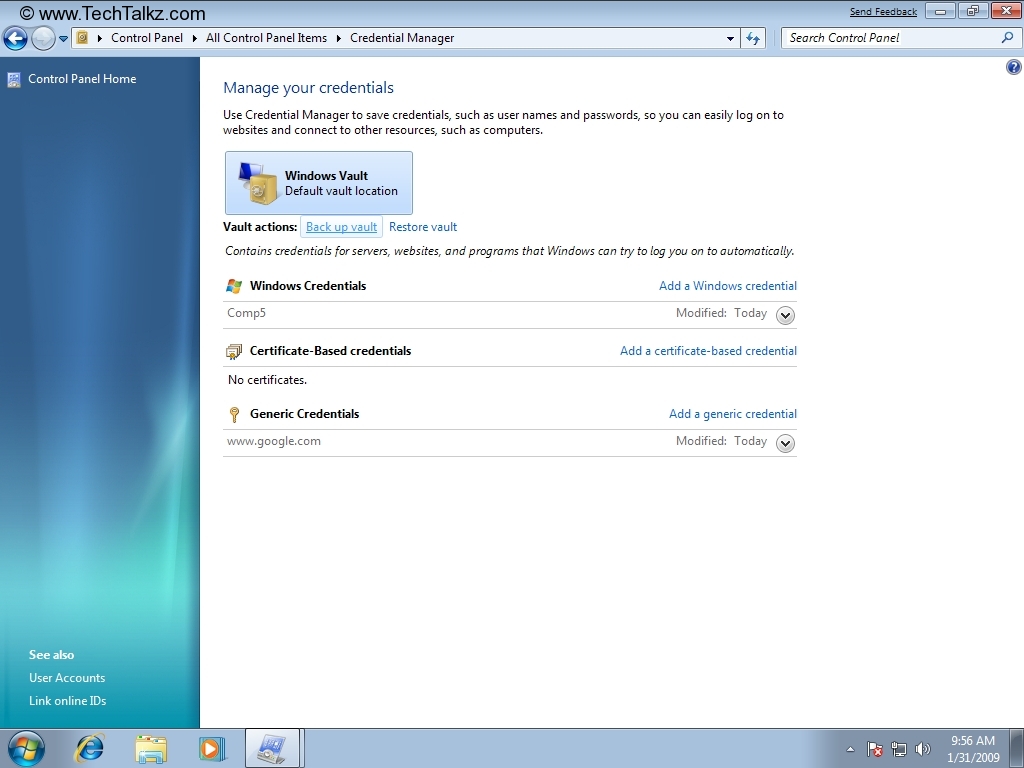
Credential Manager in Win 7
Credential Manager allows you to store credentials, such as user names and passwords that you use to log on to websites or other computers on a network. By storing your credentials, Windows can automatically log you on to websites or other computers. Credentials are saved in vaults.
Let's see how to Manage Credentials in Windows 7:
1. Click the Start and then choose the Control Panel option.
2. Control Panel opens up.

3. Click to open Credential Manager.

4. Click Add a Windows credential.

In the Resource box, type the name of the computer on the network or the URL of the website that you want to access.
In the User name and Password boxes, type the user name and password that you use for that computer or website, and then click OK.

As you can see in the above screen shot, you can perform actions like Edit/Remove the credential from the vault at any time.
5. Click Add a certificate-based credential.

Click Open the Certificate Manager to view the Current User Certificates.

Provide the resource and click Select Certificate and Ok.
6. Windows Vault contains credentials for servers, websites and programs that windows can try to log you on to automatically.
Click Back up vault.
Browse the location to store Windows Vault backup. Click Next.

Press CTRL+ALT+DELETE to continue your backup.

You will be prompted to provide password to protect the backup file. Type the Password and Click Next.
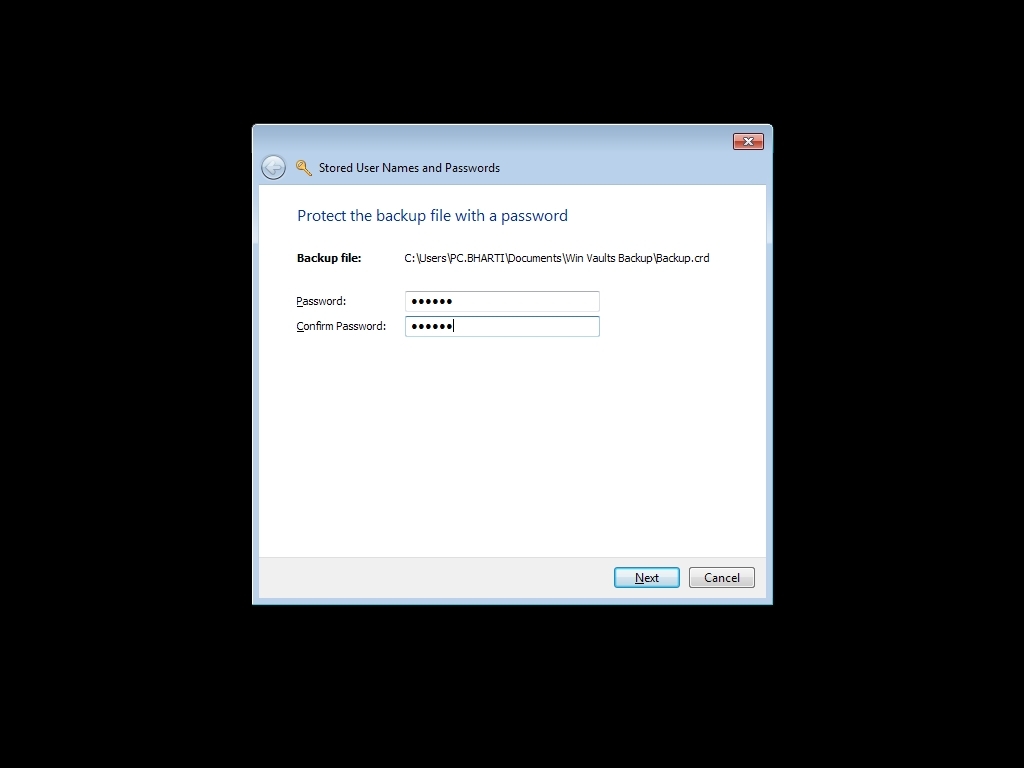
Click Finish.
7. You can also restore the vault. For that click Restore Vault in the Credential Manager window.

Browse the location of the Backup vault file and then click Next.

Press CTRL+ALT+DELETE to continue restoring your logon credentials.

You will be prompted to provide password for the the backup file. Type the password and click Next.
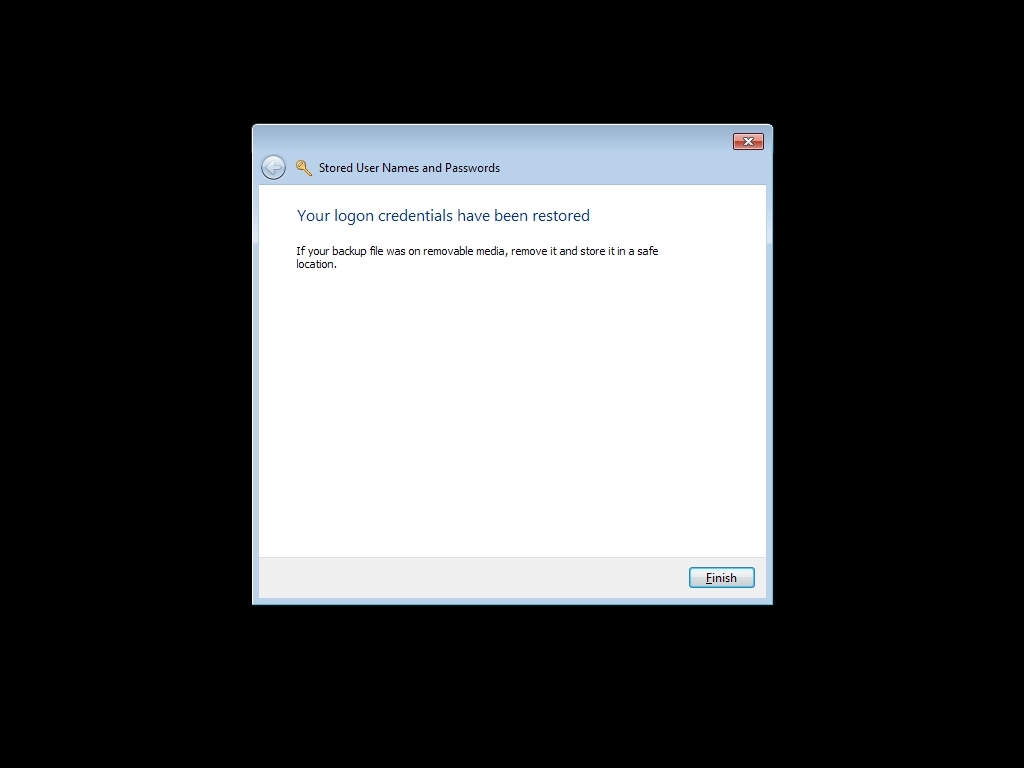
Click Finish.
How to use Device Manager in Win 7
Device Manager provides you the facility to graphically view the hardware that is installed on your computer. You can use Device Manager to manage devices only on a local computer. Using Device Manager you can:
To check these options:
1. Click the Start button to view the Start Menu and then choose the Control Panel option.

2. The Control Panel window opens up.
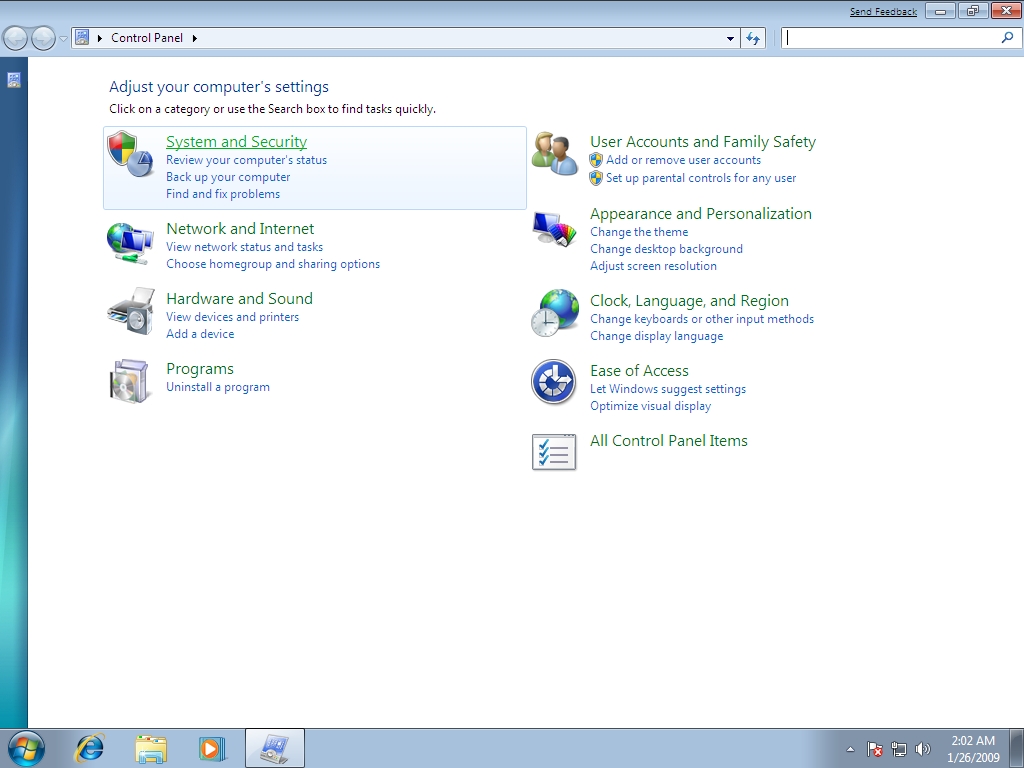
Now click the System and Security link from this window.
3. The System and Security section of Control Panel opens up and you can see the direct link for the Device Manager.
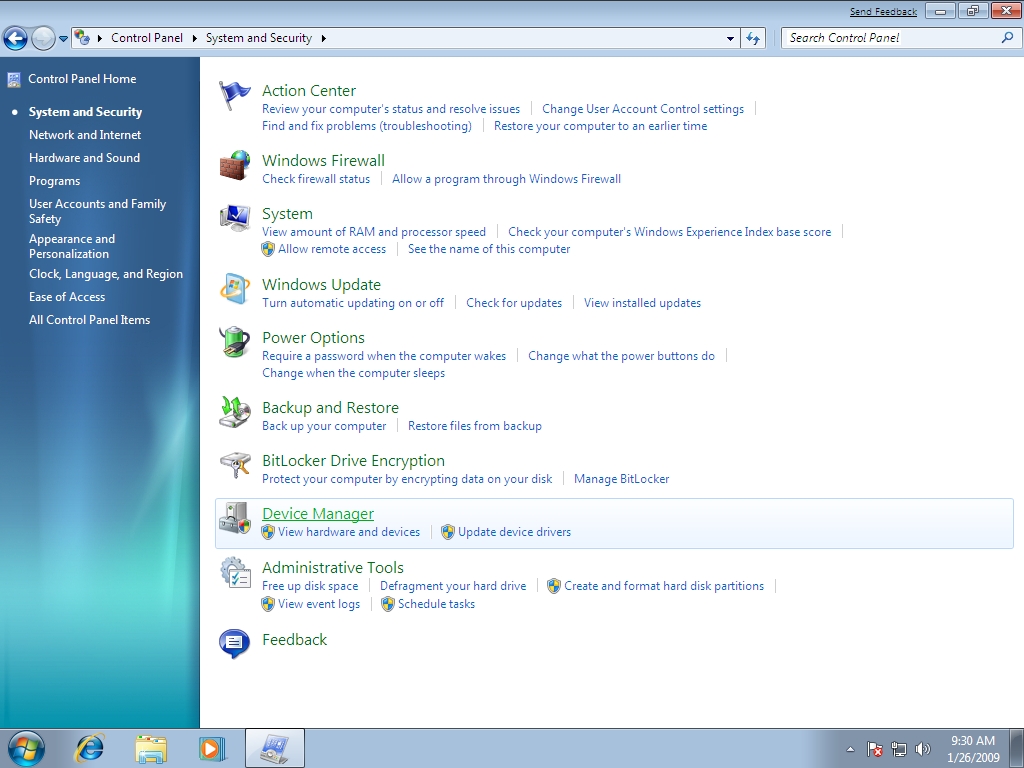
4. Click on the Device Manager and window opens up.

5. To view the hardware click on any category and the related list of installed hardware will appear. Eg. Click on Sound, vedio and game controller.

Right click on the shown sound controller. You will see various options like Update Driver Software, Disable, Uninstall and Properties etc.
6. Click on Disable to Disable the device. A confirmation popup opens up as

Clicking on Yes will disable the device and it will not function. To cancle click No.
7. Click on Uninstall to uninstall the device. Confirm Device Uninstall opens up.

Click Ok to proceed uninstalling.
8. Click on Properties to view the detail of the hardware. Click on Driver tab to view the Device Driver detail.

9. Click on Resources tab to view resource settings.

- Determine whether the hardware on your computer is working properly.
- Change hardware configuration settings.
- Identify the device drivers that are loaded for each device, and obtain information about each device driver.
- Change advanced settings and properties for devices. Install updated device drivers.
- Enable, disable, and uninstall devices.
- Roll back to the previous version of a driver.
- View the devices based on their type, by their connection to the computer, or by the resources they use.
- Show or hide hidden devices that are not critical to view but might be necessary for advanced troubleshooting
To check these options:
1. Click the Start button to view the Start Menu and then choose the Control Panel option.
2. The Control Panel window opens up.
Now click the System and Security link from this window.
3. The System and Security section of Control Panel opens up and you can see the direct link for the Device Manager.
4. Click on the Device Manager and window opens up.
5. To view the hardware click on any category and the related list of installed hardware will appear. Eg. Click on Sound, vedio and game controller.
Right click on the shown sound controller. You will see various options like Update Driver Software, Disable, Uninstall and Properties etc.
6. Click on Disable to Disable the device. A confirmation popup opens up as
Clicking on Yes will disable the device and it will not function. To cancle click No.
7. Click on Uninstall to uninstall the device. Confirm Device Uninstall opens up.
Click Ok to proceed uninstalling.
8. Click on Properties to view the detail of the hardware. Click on Driver tab to view the Device Driver detail.
9. Click on Resources tab to view resource settings.
Computer Management in Windows 7
Administrative Tools-> Computer Management: Manage local or remote computers. Using Computer Management, you can perform many tasks:
Let's see how to Manage your computer:
1. Click the Start and then choose the Control Panel option.
2. The Control Panel window opens up.

3. Click to open Administrative Tools.

3. Click Computer Management folder to manage your computer.

4. Under System Tools, click Task Scheduler to manage tasks that your computer will carry out automatically at the time you specify.

It shows the Task Status for last 24 hours and Active Tasks list. The Actions for the task scheduler are shown in the Right pane. You can Create Task, Import Task and Display All Running Tasks etc.
5. Click Create Basic Task to quickly schedule a common task.

Type Action Name and Description. click Next.

Click Weekly and Next.

Schedule the Date, Time and Weekday for the task and Click Next.

Choose the Action for the task. Click Start a program and Next.

Browse the program, Click Next and then Finish. The scheduled task will be listed in the Active Tasks List as below.

5. Under System Tools, click Event Viewer. Window opens up with the summary of Administrative Events that have occurred on the computer, Log Summary and recently viewed nodes list.

6. Click Shared Folders to view shared resources.

7. To view local users and groups list. Click Local Users and Groups.

8. Click Performance -> Monitoring Tools -> Performance monitor is used to view performance data either in real time or from a log file.

Create New Data Collector Set by clicking More Actions -> New -> Data Collector Set.

Click Next. Browse Root directory.

- Monitoring system events
- Configuring hard disks, and
- Managing system performance.
Let's see how to Manage your computer:
1. Click the Start and then choose the Control Panel option.
2. The Control Panel window opens up.
3. Click to open Administrative Tools.
3. Click Computer Management folder to manage your computer.
4. Under System Tools, click Task Scheduler to manage tasks that your computer will carry out automatically at the time you specify.
It shows the Task Status for last 24 hours and Active Tasks list. The Actions for the task scheduler are shown in the Right pane. You can Create Task, Import Task and Display All Running Tasks etc.
5. Click Create Basic Task to quickly schedule a common task.
Type Action Name and Description. click Next.
Click Weekly and Next.
Schedule the Date, Time and Weekday for the task and Click Next.
Choose the Action for the task. Click Start a program and Next.
Browse the program, Click Next and then Finish. The scheduled task will be listed in the Active Tasks List as below.
5. Under System Tools, click Event Viewer. Window opens up with the summary of Administrative Events that have occurred on the computer, Log Summary and recently viewed nodes list.
6. Click Shared Folders to view shared resources.
7. To view local users and groups list. Click Local Users and Groups.
8. Click Performance -> Monitoring Tools -> Performance monitor is used to view performance data either in real time or from a log file.
Create New Data Collector Set by clicking More Actions -> New -> Data Collector Set.
Click Next. Browse Root directory.
Đăng ký:
Bài đăng (Atom)